


Frequently Bought Together

Total Price
$890.07 $890.07
No product description available.
Details & Specifications
| Product Type | JCB Parts |
|---|---|
| Height | 3.15 in |
| Width | 3.15 in |
| Length | 35.83 in |
| Weight | 50.71 lbs |
This part fits 45 models
Showing 1 of 8 diagrams
-
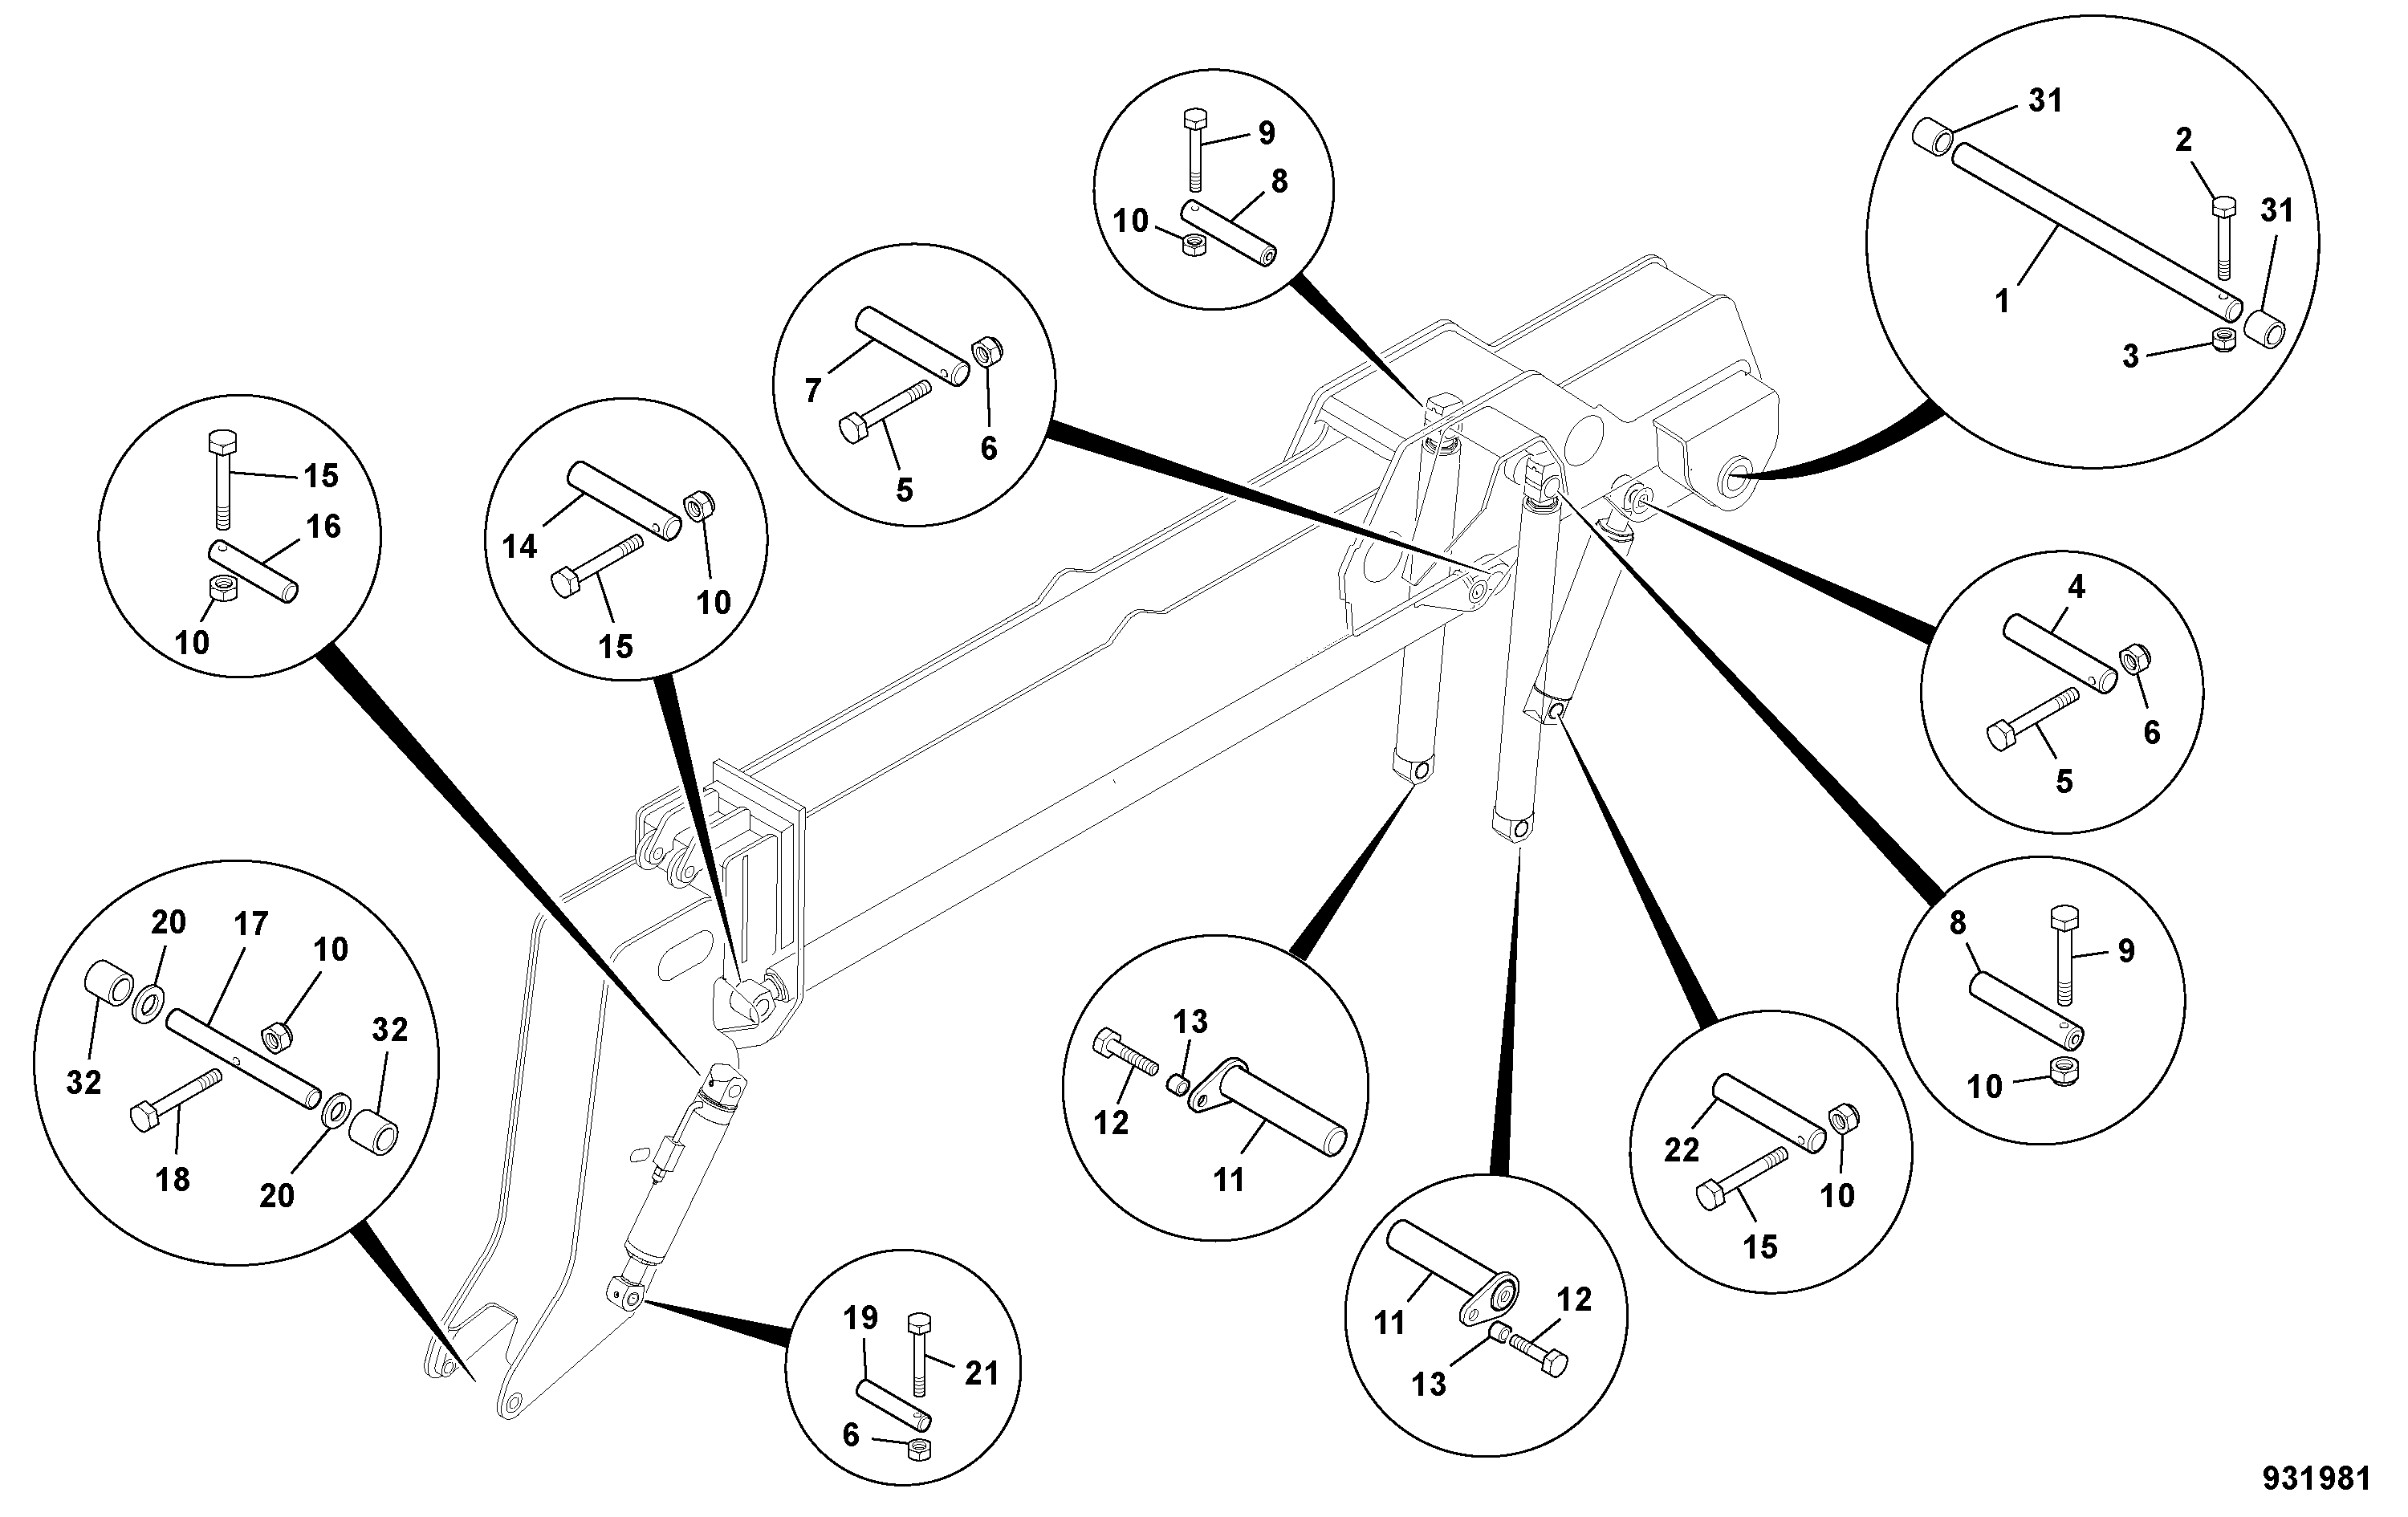
DIAG-B3-6-1-400211 B3-6-1 BOOM,PIVOT PIN LOCATION
View Diagram
-
DIAG-B3-6-1-400211 B3-6-1 BOOM,PIVOT PIN LOCATION
View Diagram
-
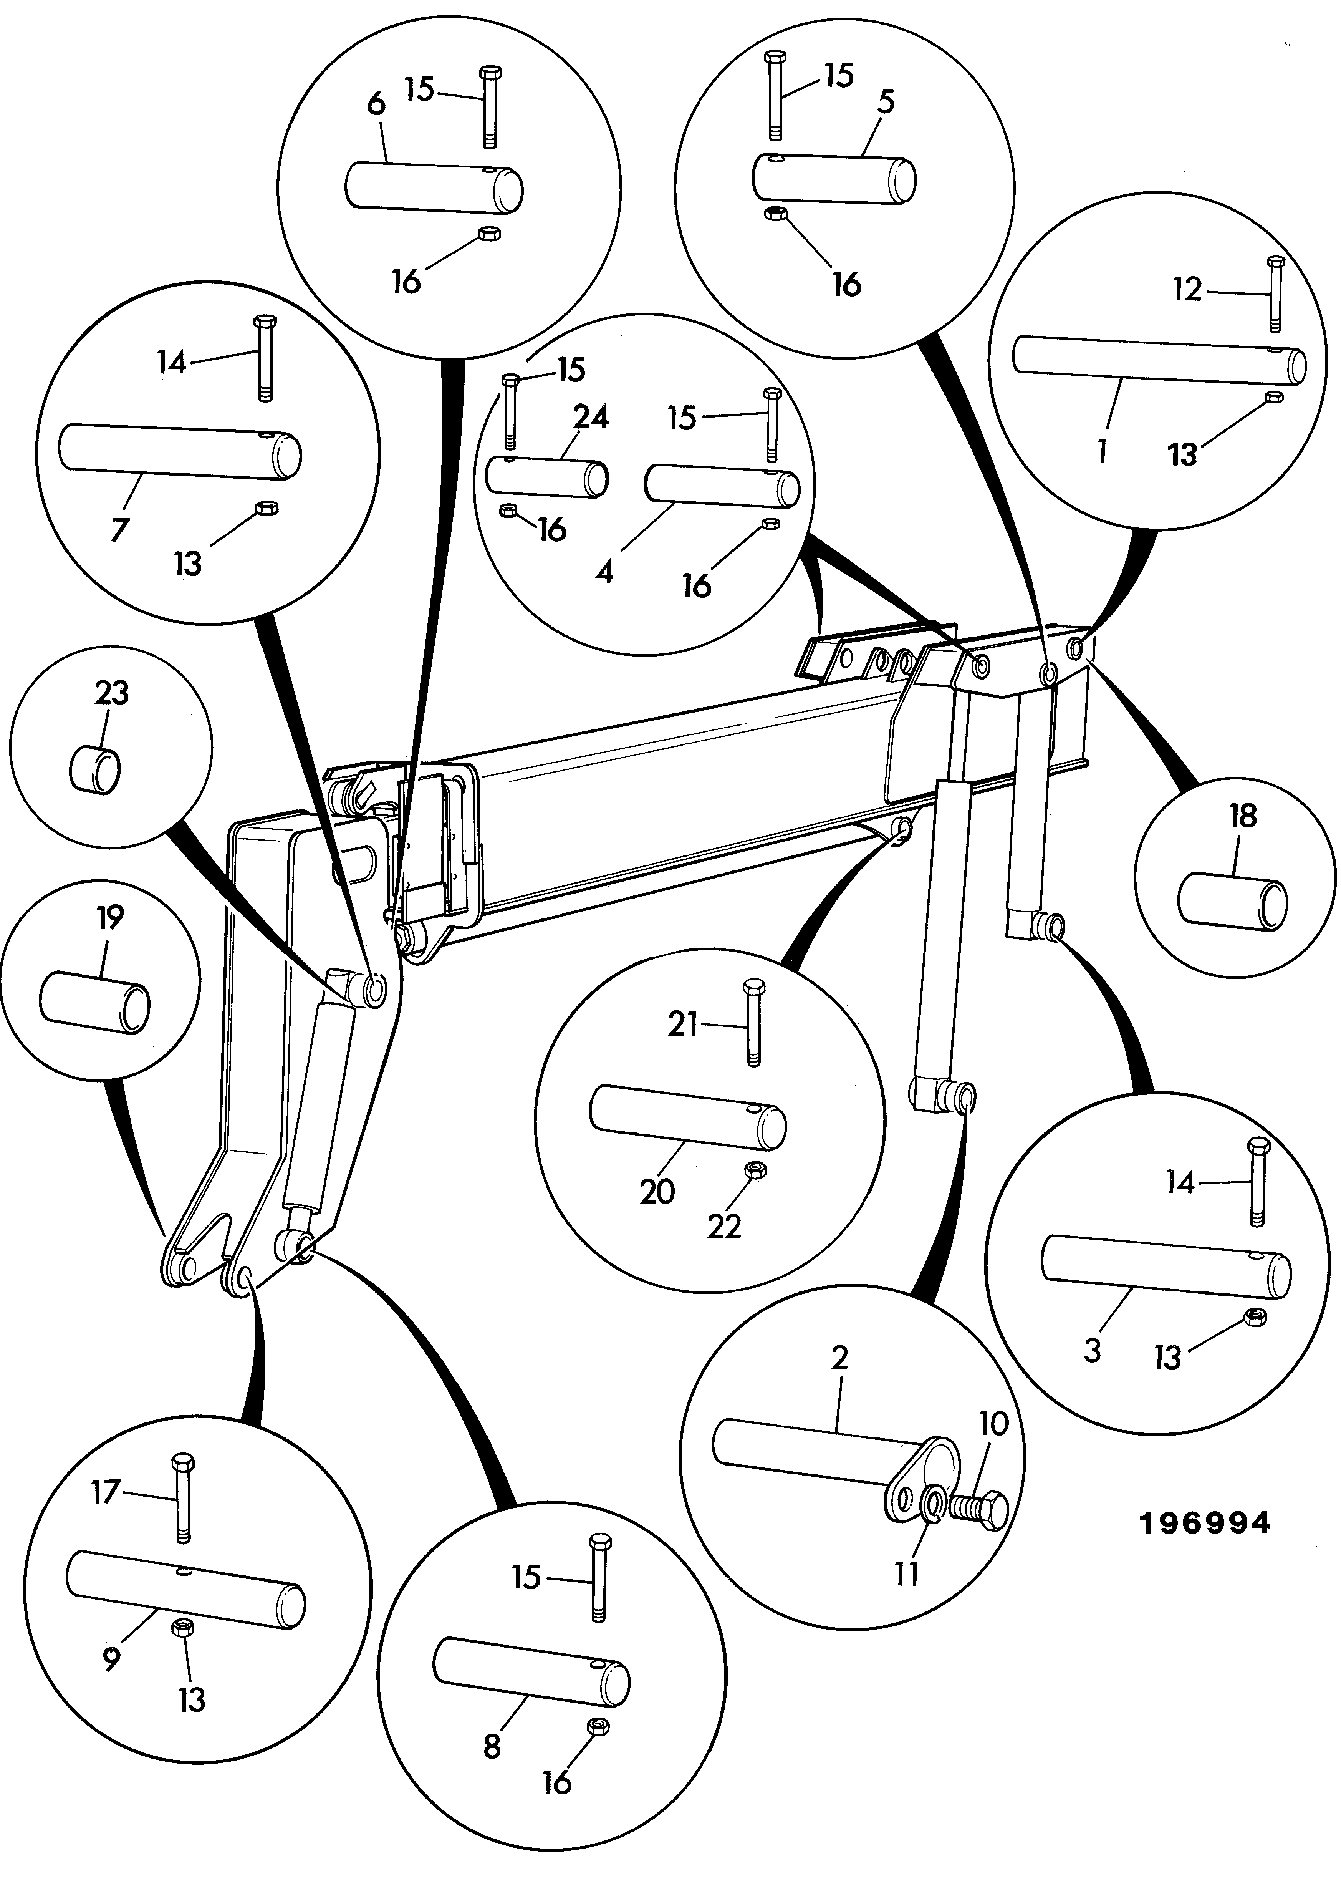
DIAG-B3-2-2-400234 B3-2-2 BOOM,PIVOT PIN LOCATION
View Diagram
-
DIAG-B3-2-2-400234 B3-2-2 BOOM,PIVOT PIN LOCATION
View Diagram
-
DIAG-B3-2-2-400234 B3-2-2 BOOM,PIVOT PIN LOCATION
View Diagram
-
DIAG-B3-2-2-400234 B3-2-2 BOOM,PIVOT PIN LOCATION
View Diagram
-
DIAG-B3-2-2-400234 B3-2-2 BOOM,PIVOT PIN LOCATION
View Diagram
-
DIAG-B3-2-2-400234 B3-2-2 BOOM,PIVOT PIN LOCATION
View Diagram
-
DIAG-B3-2-2-400234 B3-2-2 BOOM,PIVOT PIN LOCATION
View Diagram
-
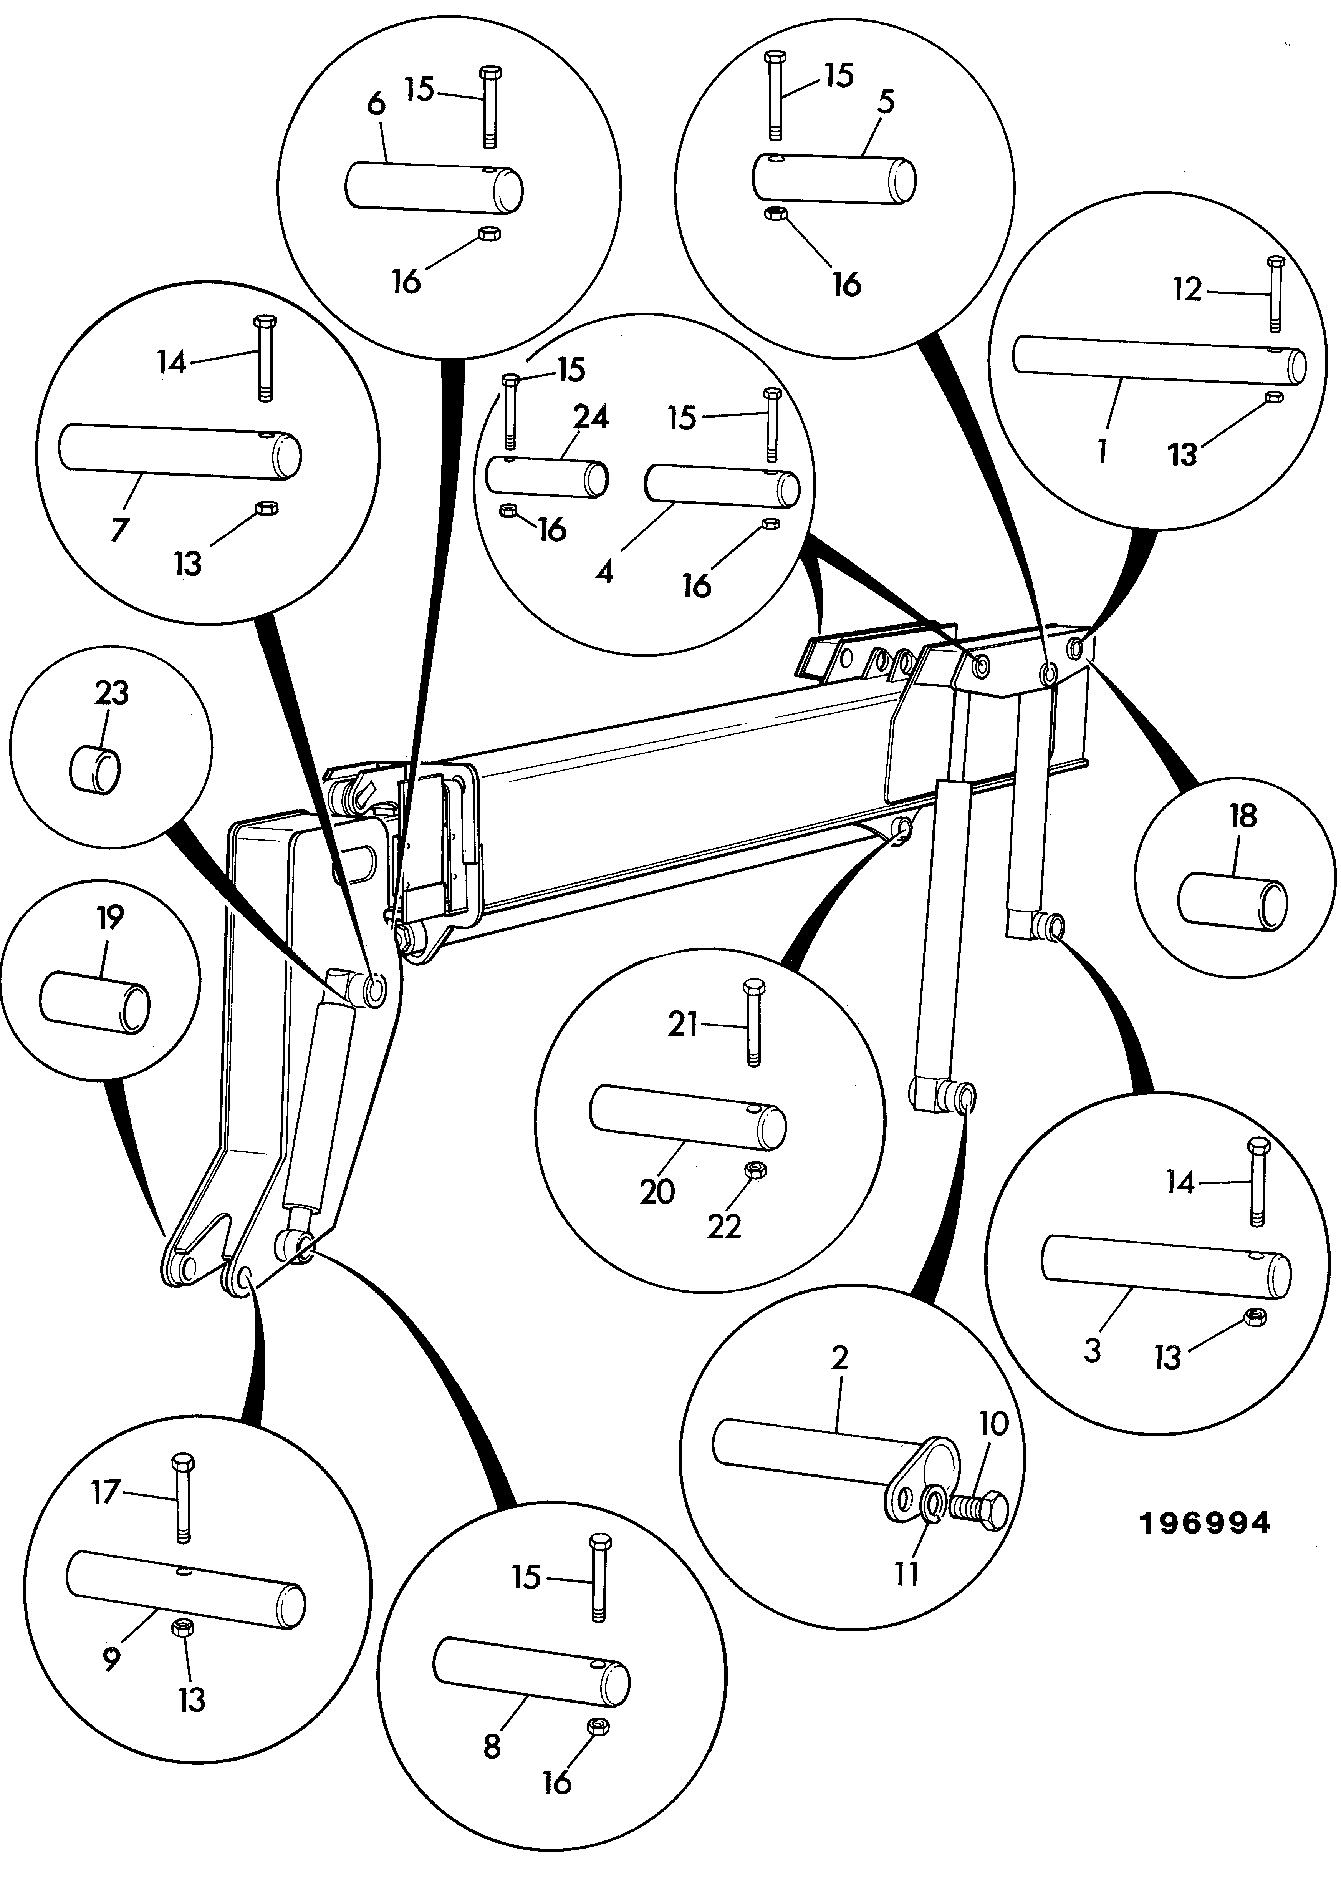
DIAG-B3-2-2-400241 B3-2-2 BOOM,PIVOT PIN LOCATION
View Diagram
-
DIAG-B3-2-2-400241 B3-2-2 BOOM,PIVOT PIN LOCATION
View Diagram
-
DIAG-B3-2-2-400241 B3-2-2 BOOM,PIVOT PIN LOCATION
View Diagram
-
DIAG-B3-2-2-400241 B3-2-2 BOOM,PIVOT PIN LOCATION
View Diagram
-
DIAG-B3-2-2-400234 B3-2-2 BOOM,PIVOT PIN LOCATION
View Diagram
-
DIAG-B3-2-2-400234 B3-2-2 BOOM,PIVOT PIN LOCATION
View Diagram
-
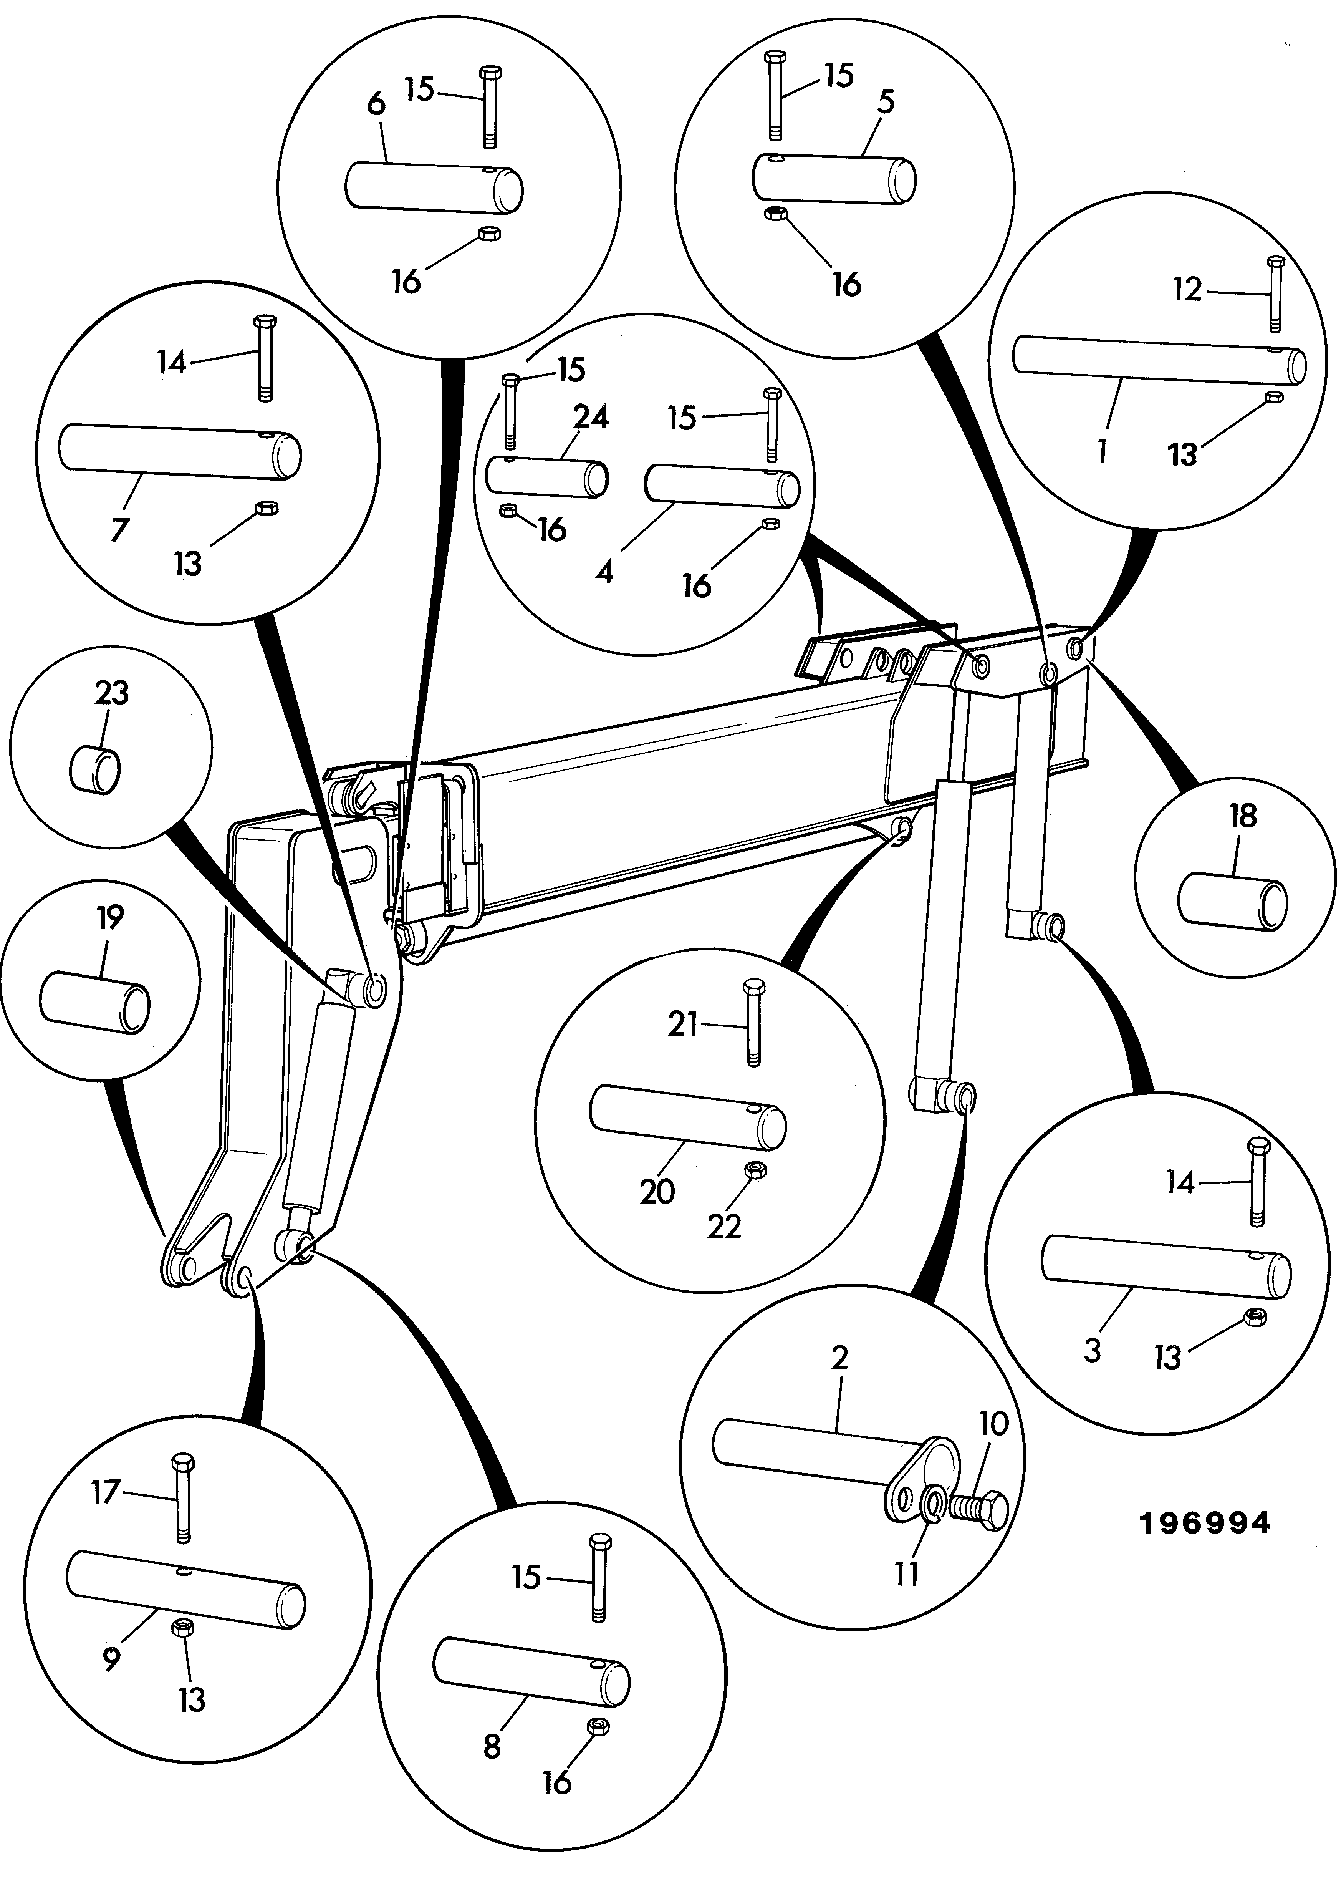
DIAG-B3-2-3-400247 B3-2-3 BOOM,PIVOT PIN LOCATION
View Diagram
-
DIAG-B3-2-3-400247 B3-2-3 BOOM,PIVOT PIN LOCATION
View Diagram
-
DIAG-B3-2-3-400247 B3-2-3 BOOM,PIVOT PIN LOCATION
View Diagram
-
DIAG-B3-2-3-400247 B3-2-3 BOOM,PIVOT PIN LOCATION
View Diagram
-
DIAG-B3-2-3-400247 B3-2-3 BOOM,PIVOT PIN LOCATION
View Diagram
-
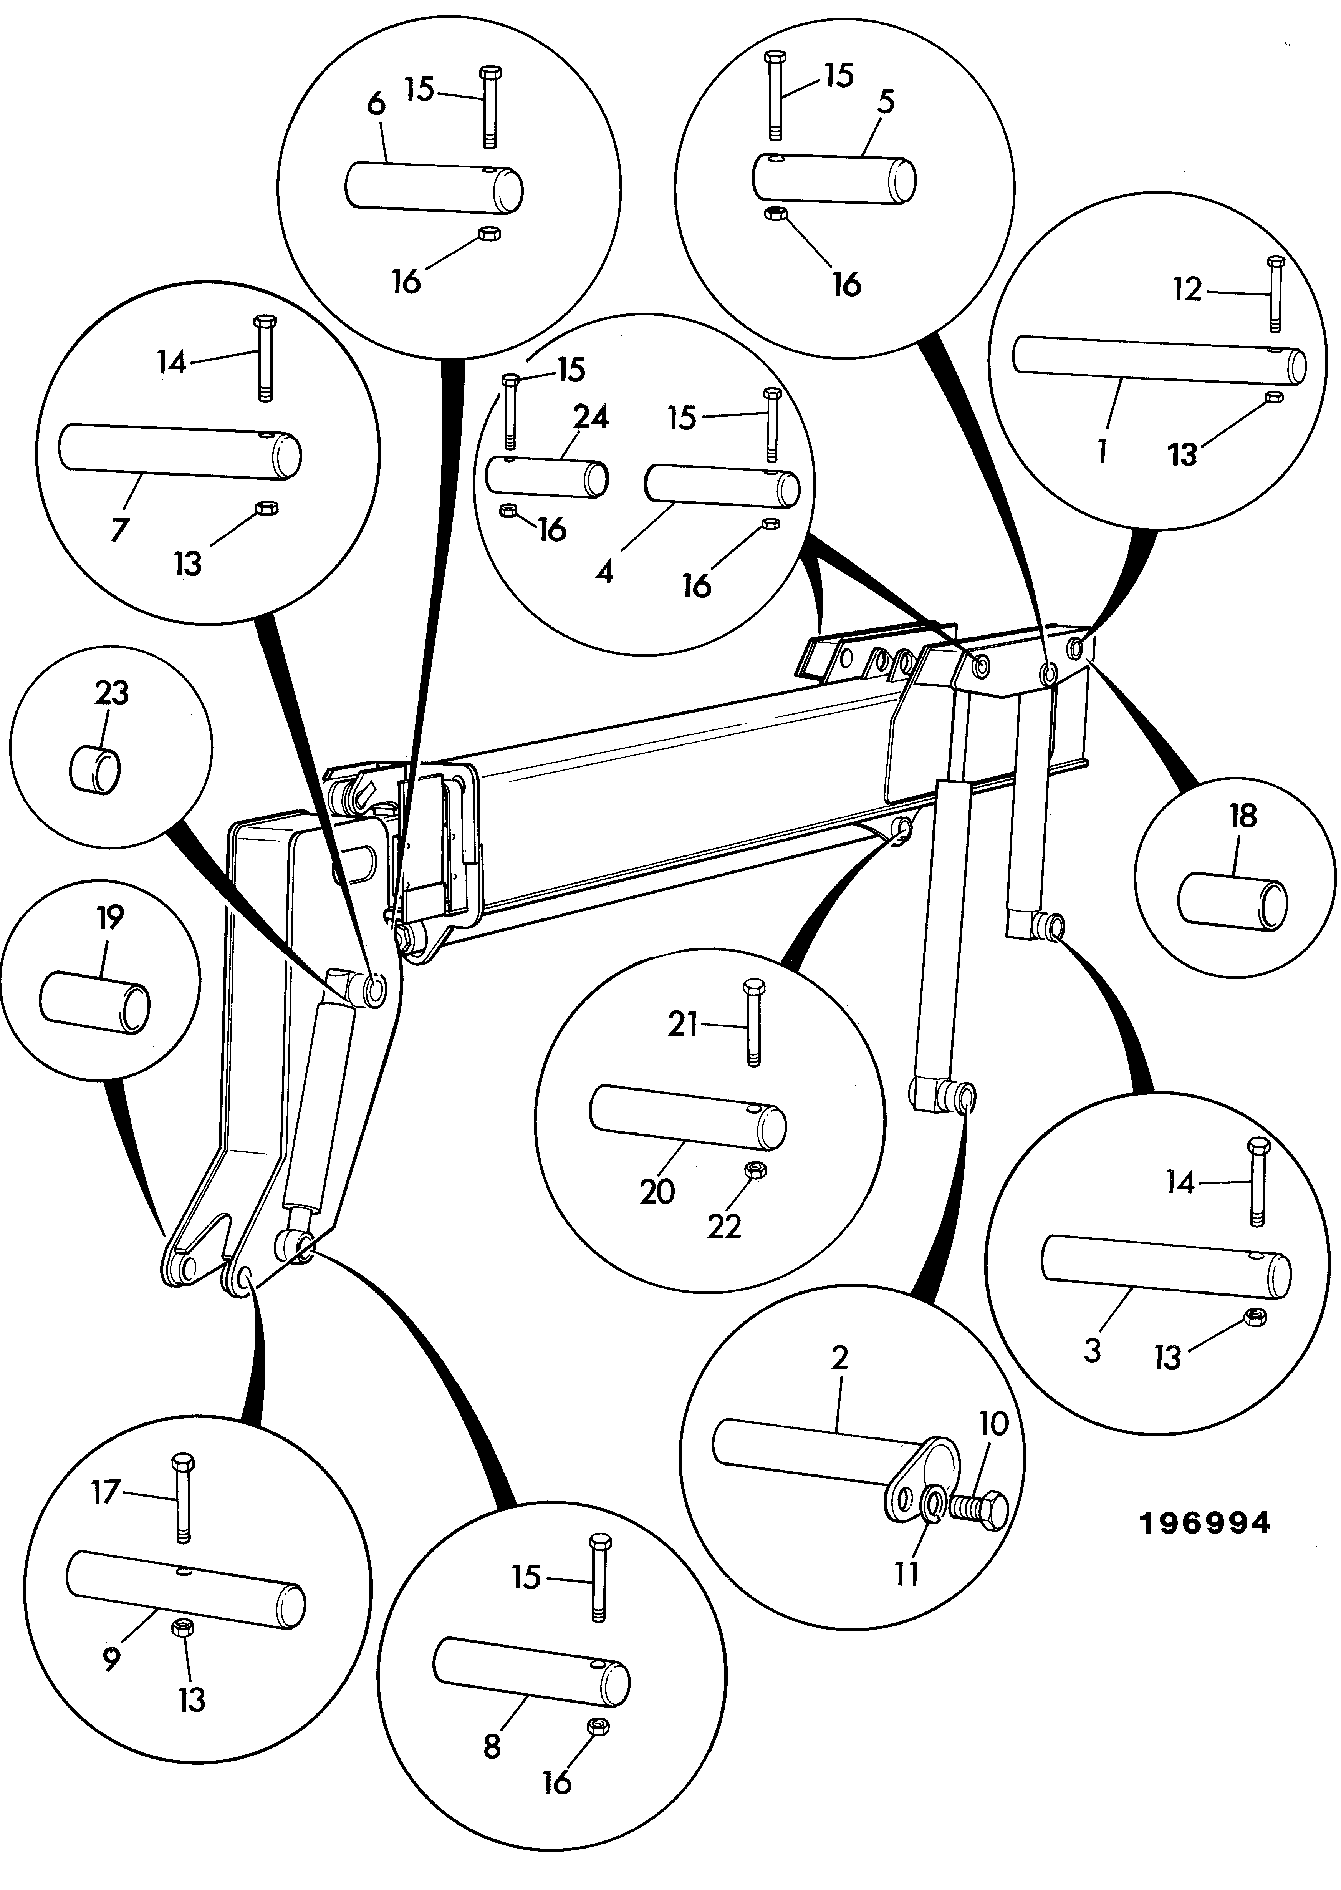
DIAG-B3-2-3-400252 B3-2-3 BOOM,PIVOT PIN LOCATION
View Diagram
-
DIAG-B3-2-2-400241 B3-2-2 BOOM,PIVOT PIN LOCATION
View Diagram -
DIAG-B3-2-3-400252 B3-2-3 BOOM,PIVOT PIN LOCATION
View Diagram
-
DIAG-B3-2-2-400241 B3-2-2 BOOM,PIVOT PIN LOCATION
View Diagram -
DIAG-B3-2-3-400252 B3-2-3 BOOM,PIVOT PIN LOCATION
View Diagram
-
DIAG-B3-2-2-400241 B3-2-2 BOOM,PIVOT PIN LOCATION
View Diagram -
DIAG-B3-2-3-400252 B3-2-3 BOOM,PIVOT PIN LOCATION
View Diagram
-
DIAG-B3-2-3-400247 B3-2-3 BOOM,PIVOT PIN LOCATION
View Diagram
-
DIAG-B3-2-3-400247 B3-2-3 BOOM,PIVOT PIN LOCATION
View Diagram
-
DIAG-B3-2-3-400247 B3-2-3 BOOM,PIVOT PIN LOCATION
View Diagram
-
DIAG-B3-6-1-400211 B3-6-1 BOOM,PIVOT PIN LOCATION
View Diagram
-
DIAG-B3-6-1-400211 B3-6-1 BOOM,PIVOT PIN LOCATION
View Diagram
-
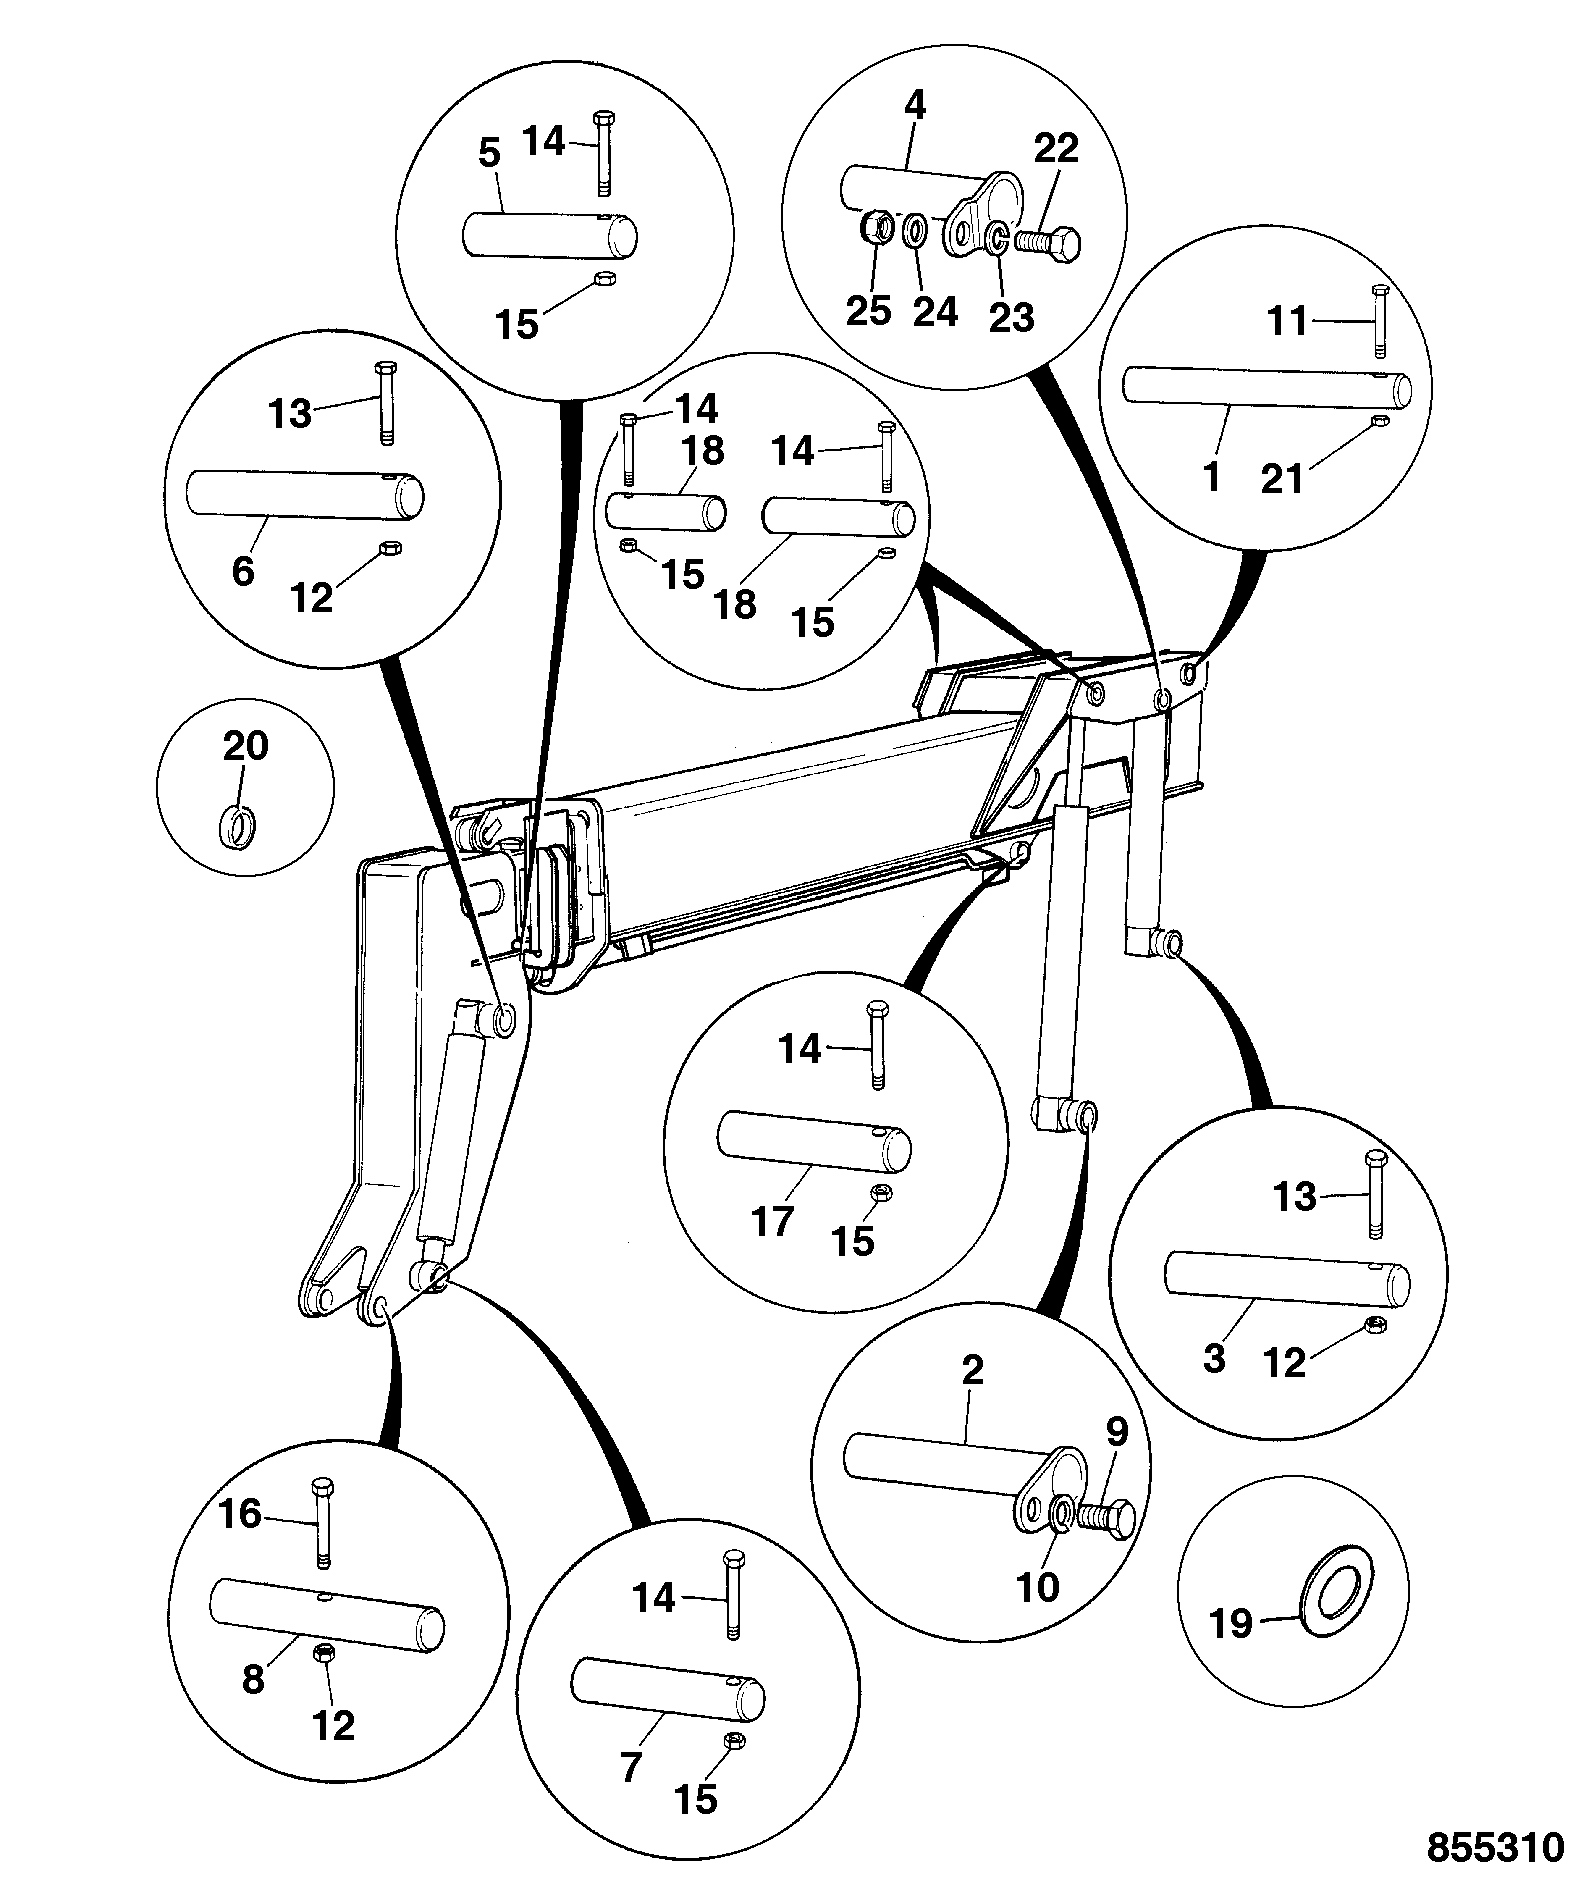
DIAG-B3-2-4-400298 B3-2-4 BOOM,PIVOT PIN LOCATION
View Diagram
-
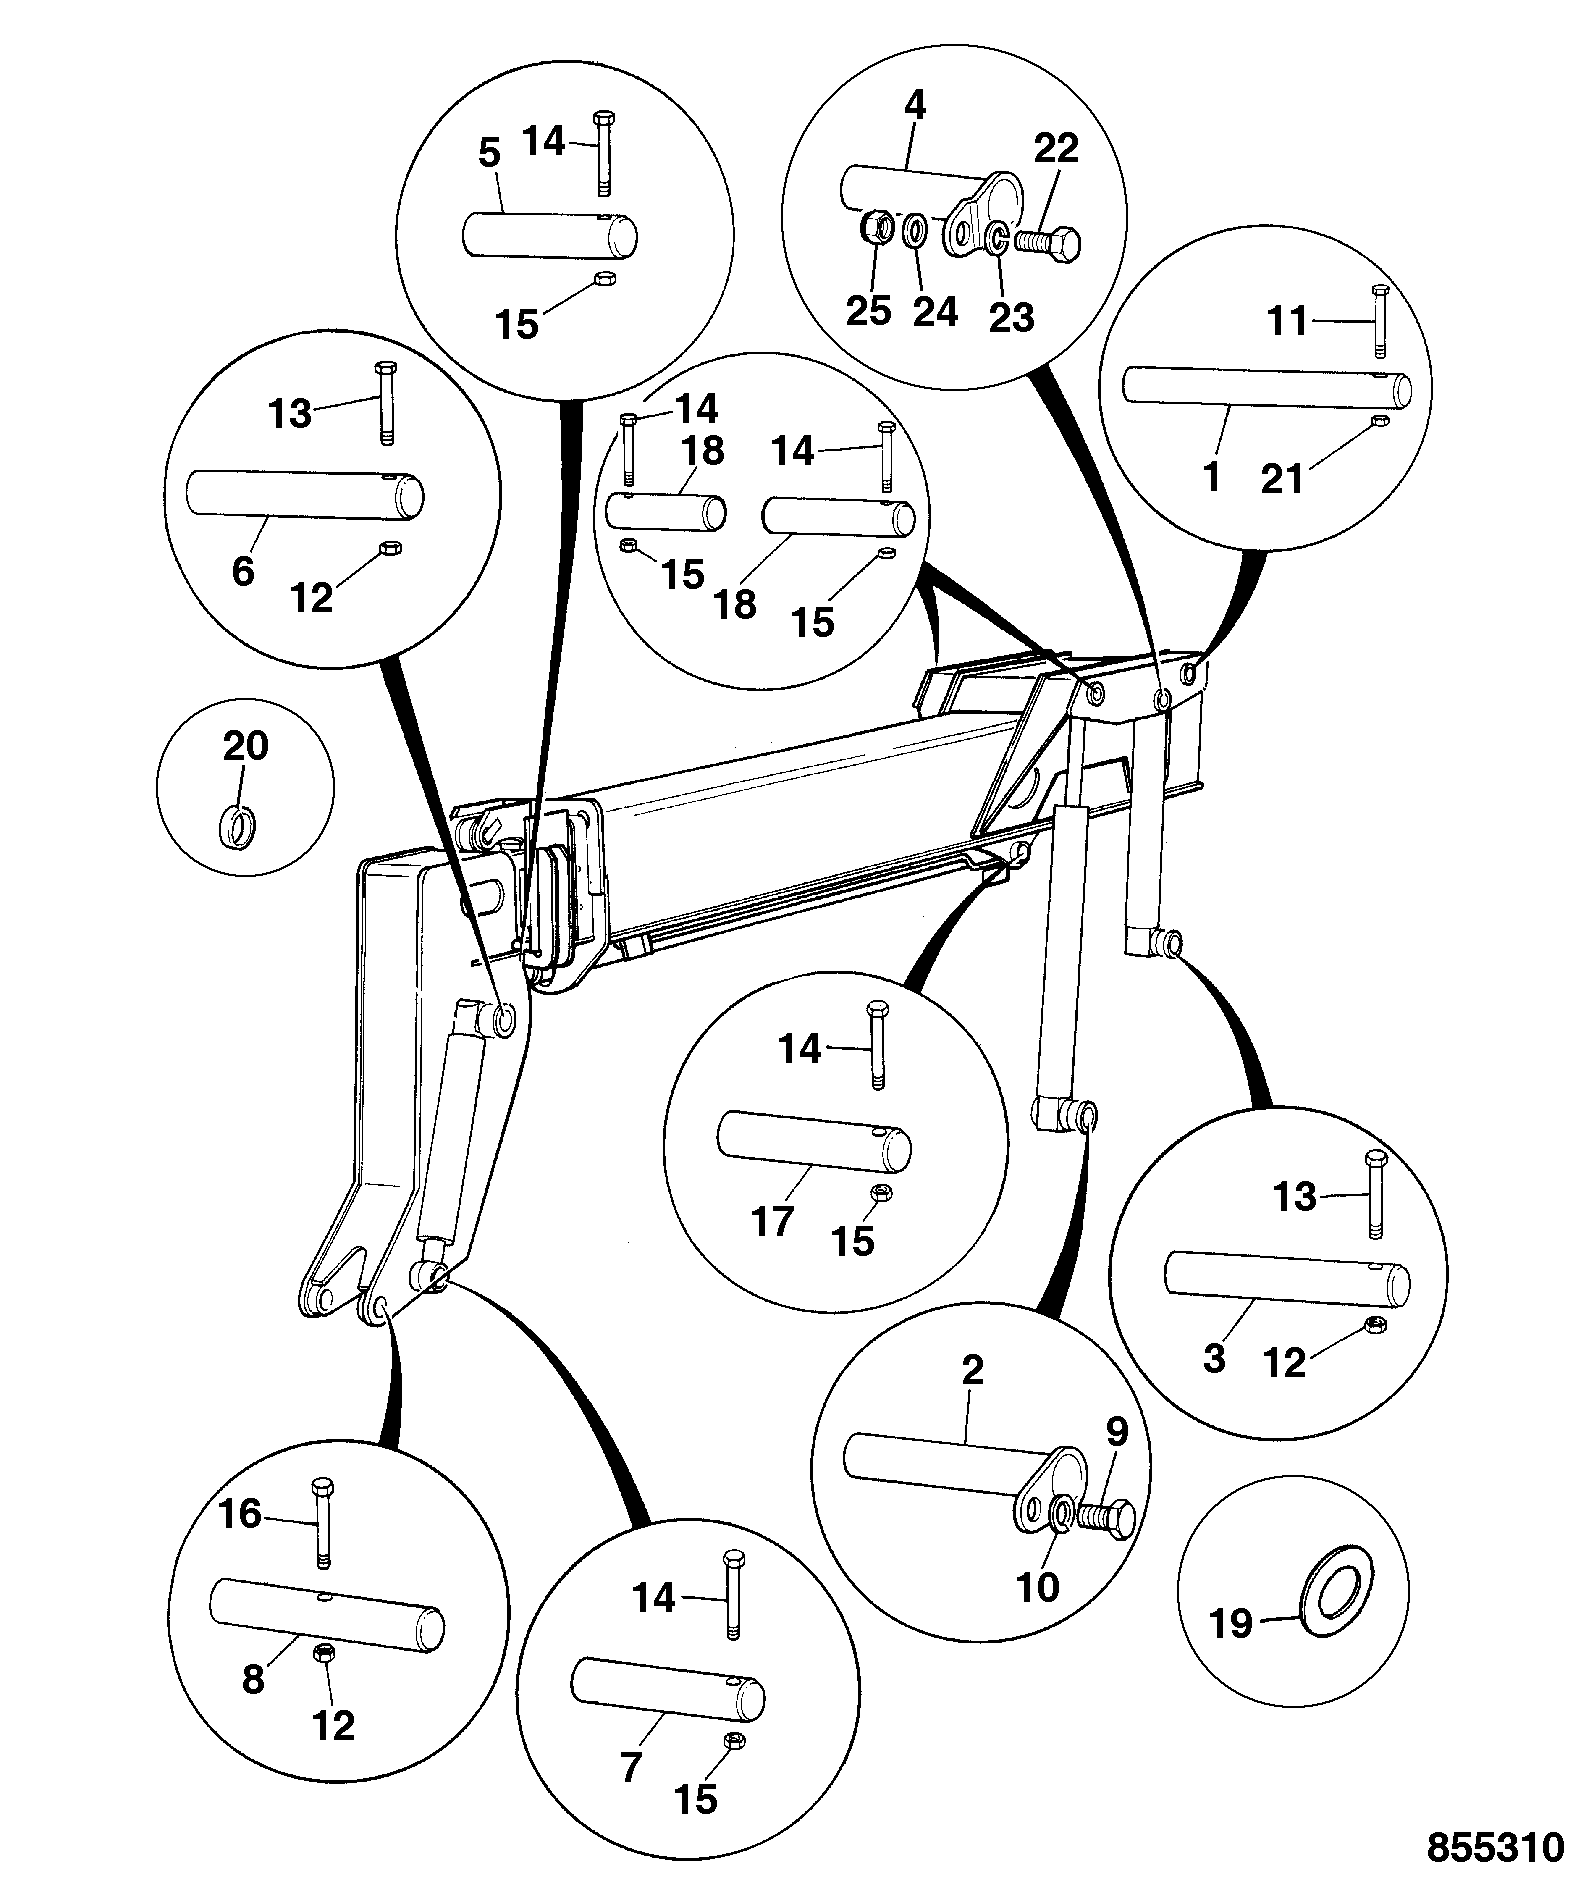
DIAG-B3-2-1-400299 B3-2-1 BOOM,PIVOT PIN LOCATION
View Diagram -
DIAG-B3-2-4-400298 B3-2-4 BOOM,PIVOT PIN LOCATION
View Diagram
-
DIAG-B3-2-1-400299 B3-2-1 BOOM,PIVOT PIN LOCATION
View Diagram -
DIAG-B3-2-4-400298 B3-2-4 BOOM,PIVOT PIN LOCATION
View Diagram
-
DIAG-B3-2-1-400299 B3-2-1 BOOM,PIVOT PIN LOCATION
View Diagram
-
DIAG-B3-2-1-400299 B3-2-1 BOOM,PIVOT PIN LOCATION
View Diagram
-
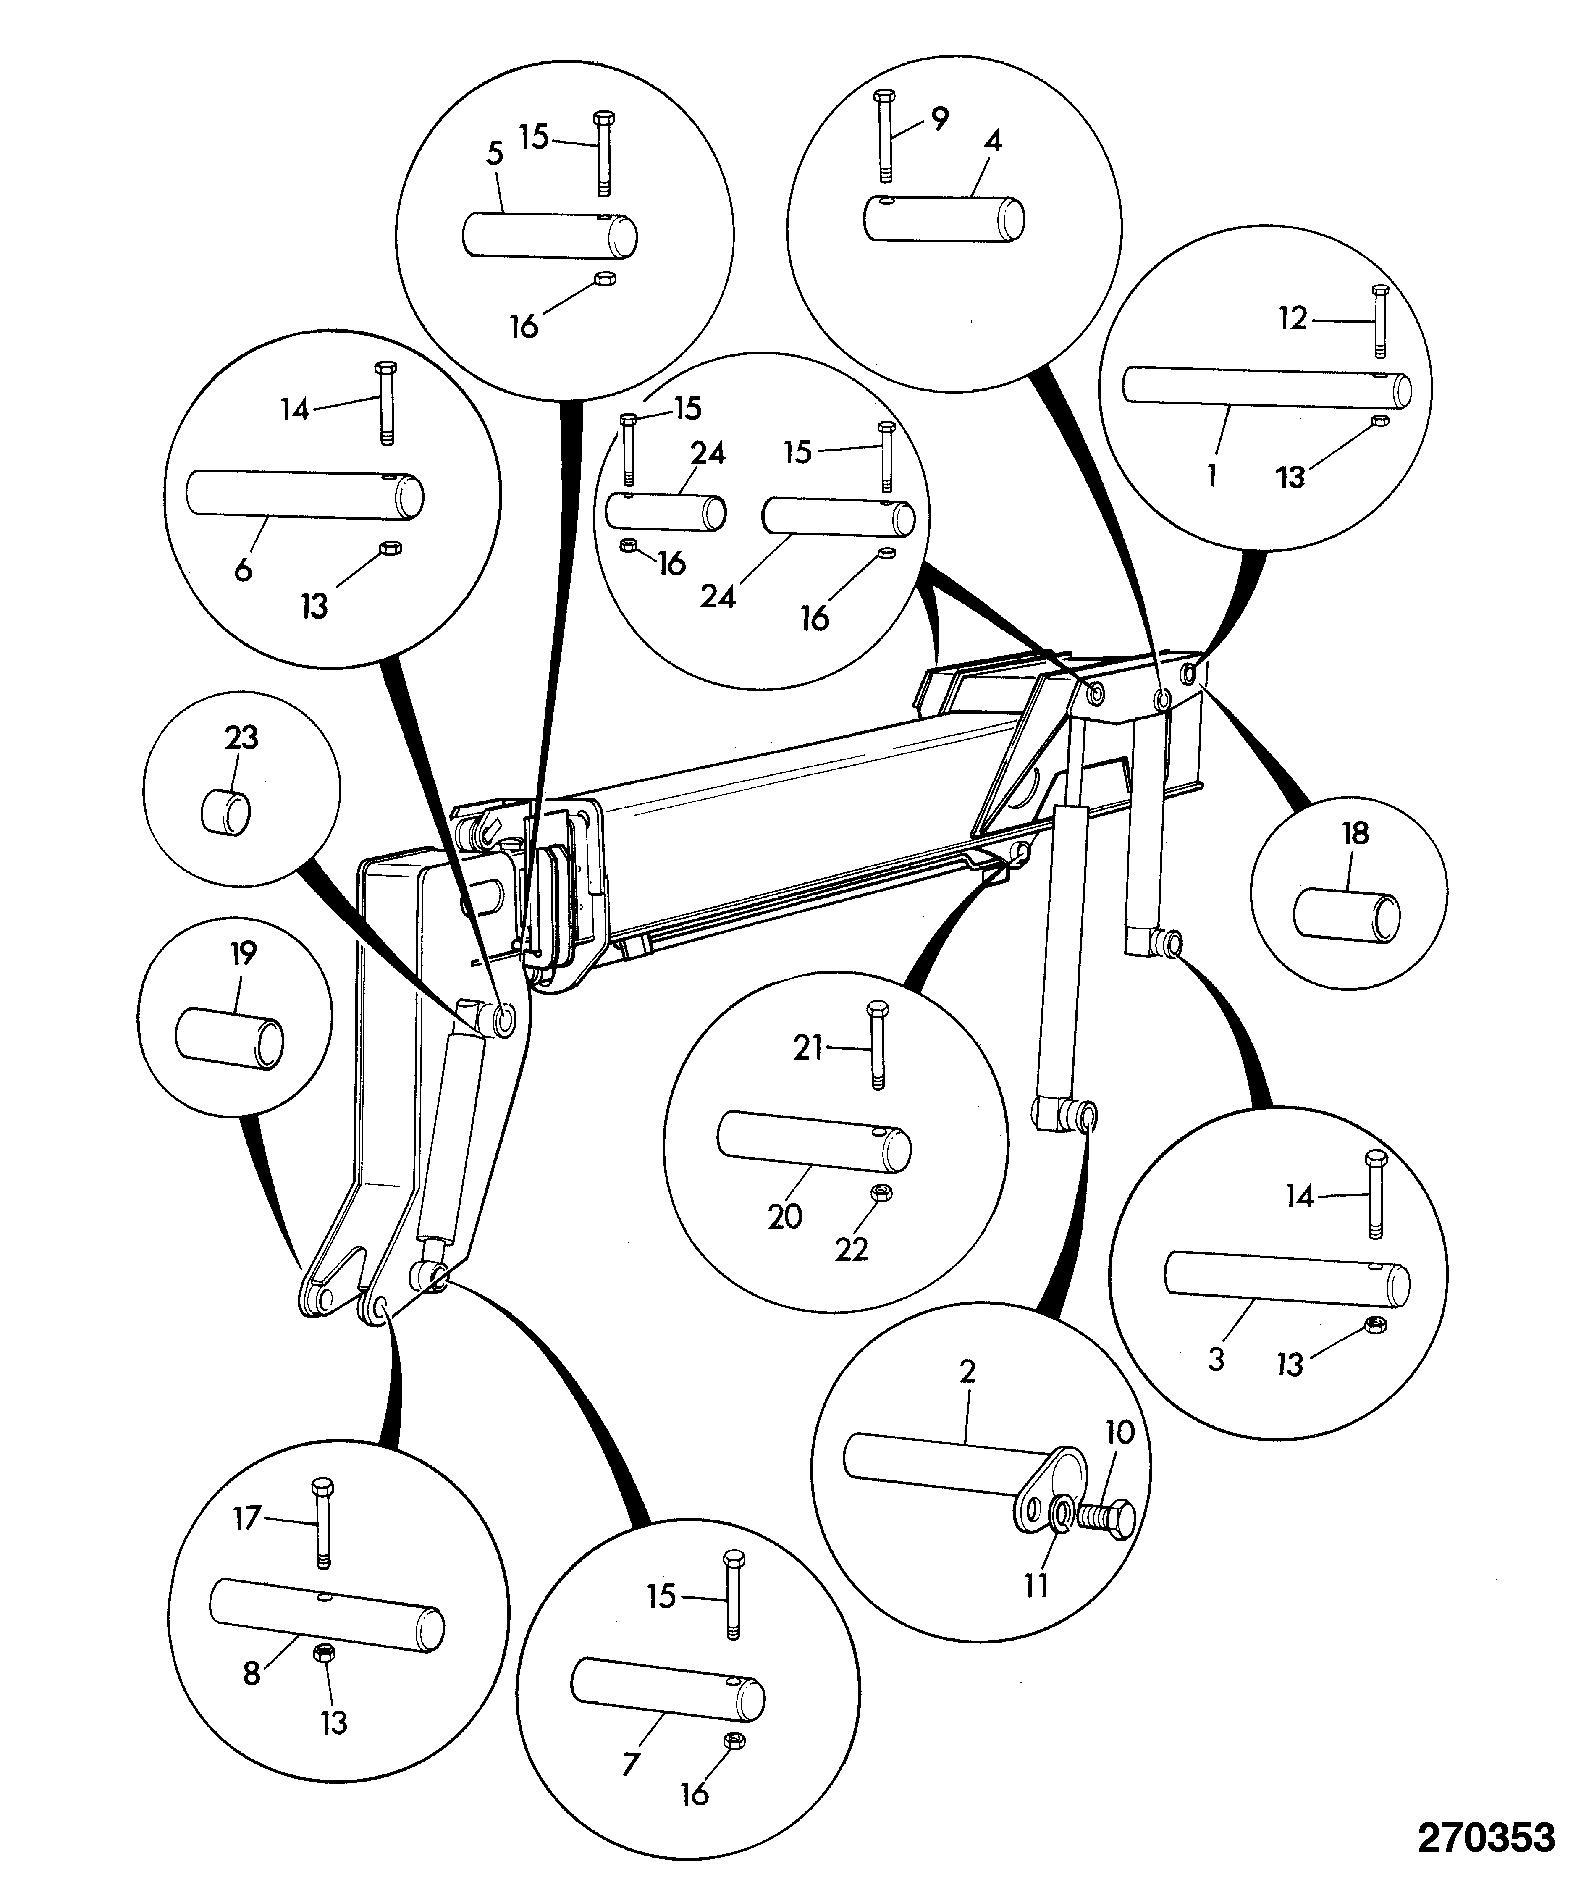
DIAG-B3-2-1-400303 B3-2-1 BOOM PIVOT PIN LOCATION
View Diagram
-
DIAG-B3-2-1-400303 B3-2-1 BOOM PIVOT PIN LOCATION
View Diagram
-
DIAG-B3-2-1-400303 B3-2-1 BOOM PIVOT PIN LOCATION
View Diagram
-
DIAG-B3-2-1-400303 B3-2-1 BOOM PIVOT PIN LOCATION
View Diagram
-
DIAG-B3-2-1-400303 B3-2-1 BOOM PIVOT PIN LOCATION
View Diagram
-
DIAG-B3-2-1-400303 B3-2-1 BOOM PIVOT PIN LOCATION
View Diagram
-
DIAG-B3-2-1-400303 B3-2-1 BOOM PIVOT PIN LOCATION
View Diagram
-
DIAG-B3-2-1-400303 B3-2-1 BOOM PIVOT PIN LOCATION
View Diagram
-
DIAG-B3-2-1-400303 B3-2-1 BOOM PIVOT PIN LOCATION
View Diagram
-
DIAG-B3-6-1-400211 B3-6-1 BOOM,PIVOT PIN LOCATION
View Diagram
-
DIAG-B3-6-1-400211 B3-6-1 BOOM,PIVOT PIN LOCATION
View Diagram

Customer Reviews Reviews
There are no reviews yet.